Limescale Prevention and Treatment Guide


What Causes Limescale?
Limescale develops when the pH of the water is left consistently higher than the pH OK Range of the test strips. The high pH causes any calcium in the water to crystallise, which normally happens within the heater due to the reduced surface area inside the heater. If left unchecked, scale will continue to form and will eventually choke the heater completely.
Detecting Limescale
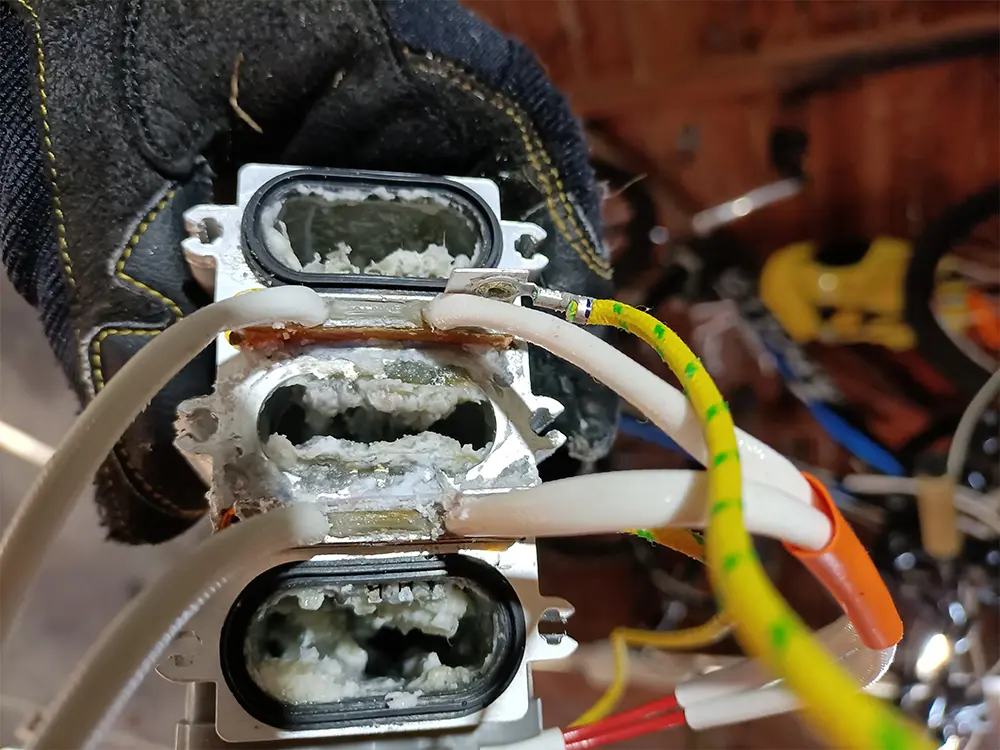
Scale can often be detected visually by noticing white "flakes" in the water, usually on the floor of the spa underneath the outlet or within the outlet grill. Many people mistake this for chemicals which did not fully dissolve. You may also notice a white chalky buildup on the spa walls.
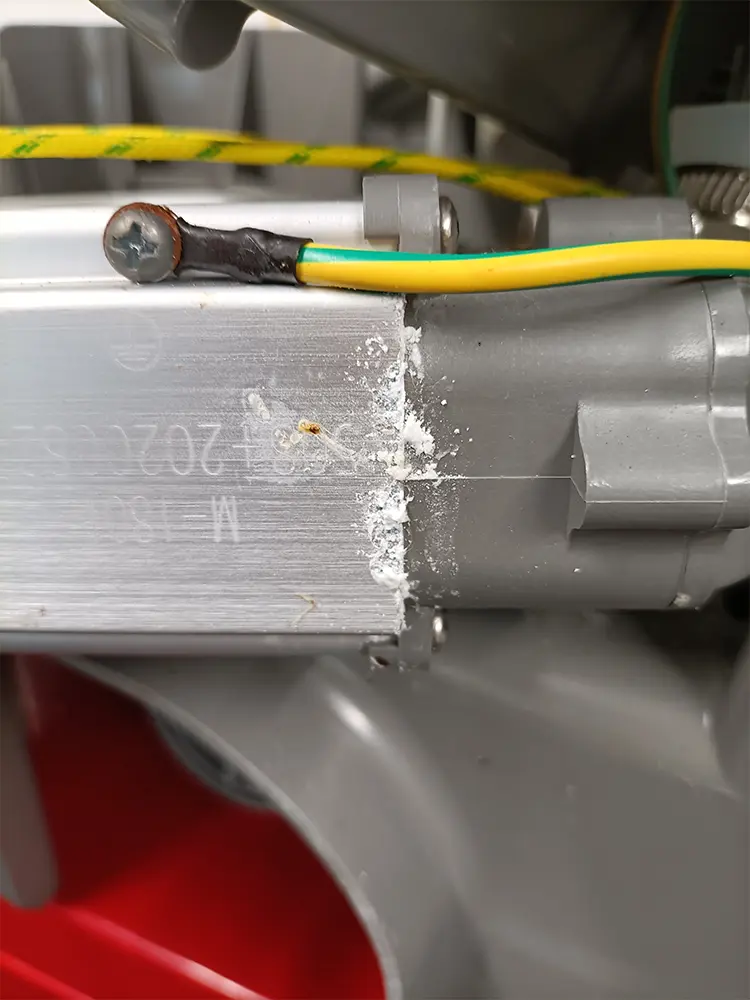
If you believe you may have limescale, an easy thing to check is the inlets and outlets on the control unit. These will generally have a chalky white residue all around if limescale is present.
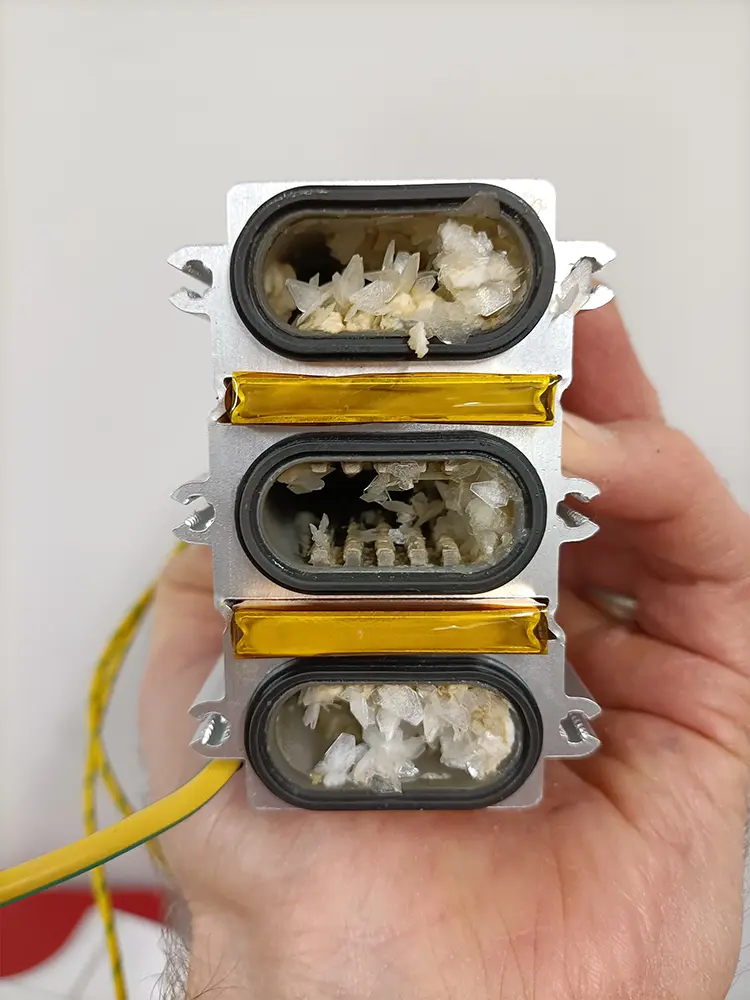
Inspecting the Heater
If you have a frame series spa pool, with the control unit on the outside of the spa and want to go one step further, grab the 3 grey threaded caps that came with the spa and screw into the inlet, outlet and bubbler line (the bubbler cap connects on the outside of the spa). This will save you from losing all of your spa water. Now undo the three grey collars connecting the control unit to the spa. Pull the control unit away from the spa far enough to give yourself enough room to easily access the back flat panel. Unscrew the 5 back panel screws and you will have a good view of the heater. Look at where the metal meets the plastic. If the heater is full of limescale, you will usually see the scale forcing its way out of the heater seam.
Smart control unit owners: The spa would first need to be drained and then removed from the shell to access the heater. You can find helpful video instructions on how to remove the control unit from a Comfort series (Bergen or Tekapo) spa pool.
Effects of Limescale on Your Control Unit
Limescale can have a number of undesirable effects on your control unit:
Flow Restriction and Errors
As the scale continues to form, flow becomes restricted through the heater and the flow switches detect a problem. To avoid damaging the system, the control unit will start to present flow errors such as E1 or F1.
Reduced Heating Efficiency
Because limescale coats the inside of the heater element, output from the heater is reduced. This can lead to increased times to heat the spa water to the set temperature and therefore increased electrical bills.
Heater High Limit Activation
You may also come out to your spa and discover the water is much colder than the temperature you had set and doesn't appear to be heating at all, even though the heat icon is illuminated. Because of restricted flow and a scale coated element, the internal temperature of the heater can quickly reach 45°C. This causes the heater high limit to activate to avoid causing severe internal damage to the system. The heat icon will remain on but the heater has disengaged itself from the active circuit, meaning no power is going to the heater. The yellow cord rest will need to be pulled to reset the heater's high limit function.
This is only a temporary fix as the high limit will again soon activate because the scale buildup is causing the heater to overheat.
Note for newer heaters: If your heater has recently been replaced, you will notice that there is no longer a yellow pull cord. This is because replacement heaters now have a built in reset. If the heater becomes too hot internally (45°C) it will disengage itself from the active circuit to avoid damaging the system. The heat icon will remain on, however, and appear to be heating but no power is actually going to the heater. Once the temperature inside the heater cools below 45°C, it will re-engage the active and begin heating again as required. This eliminates the need for a manual reset.
Complete Heater Failure
Lastly, because the heater is working so hard and trying to heat through a coat of limescale, it will eventually fail completely. This will result in the RCD tripping every time the heater is engaged.
Prevention is Key
The best way to prevent scale from forming in your control unit and spa is to test and balance your water at least weekly. Pay close attention to the pH and add appropriate chemicals as required to keep the pH in the OK Range.
Limescale is a watercare issue and is therefore not covered under warranty, so it becomes a costly experience that could have been avoided with weekly water testing and balancing. Should you have limescale, you would be responsible for all costs associated with getting the control unit to and from our technical team in Christchurch, technician time of one hour and cost of a replacement heater.
❖Stay ahead of limescale
Test strips and pH balancers are the cheapest insurance you can buy for your control unit. Weekly testing keeps you in the OK Range and out of the repair queue.
View water care essentials →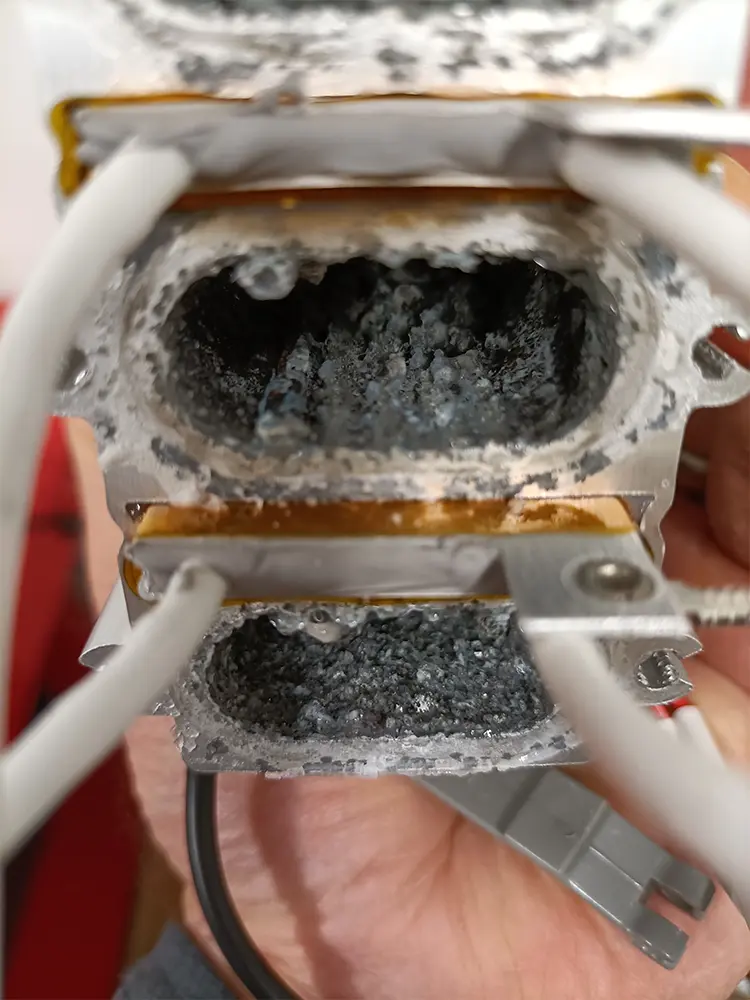
Caution: Avoid Overcorrecting pH
⚠Don't go the other way
If you have had limescale in the past or are afraid of getting limescale, be sure not to intentionally keep the pH below the OK Range on your test strips. A low pH causes the spa water to become acidic and therefore corrosive.
In addition to causing problems with the heater, a pH too low or too high outside of the OK Range will also damage other components such as the filter pump, cause seals to leak and will damage the spa shell itself.
Treating Existing Limescale
If you start to see limescale, aside from testing and balancing your water, it's a good idea to purchase a descaling chemical from a local pool and spa shop. Be sure it is rated for spas and not just for pools.
White Vinegar Treatment Method
Several of our customers have had success with running white vinegar through their systems to remove the buildup. Depending on the severity of the scale, this may or may not work for you. To do this:
- 1Disconnect or remove the control unit from the spa (depending on your model).
- 2Lay the unit on its back so the inlet, outlet and bubbler outlet are facing up.
- 3Pour 1 litre of white vinegar into the heater outlet. This is the lower opening on the left.
⚠ Important: NOT the bottom central opening — that is the bubbler.
- 4Allow to sit for 2–4 hours.
- 5Stand unit upright and place garden hose in front of inlet (top right opening) and turn on.
⚠ Important: DO NOT use a high pressure nozzle — this can damage the flow switch.
- 6If the vinegar has broken down the scale, you should see white "gunk" being forced out of the lower outlet. Continue flushing until water from outlet becomes clear.
- 7Once water is clear, continue flushing for an additional 2 minutes. This ensures all of the vinegar is flushed from the system. If not flushed long enough, residual vinegar will enter your spa water and wreak havoc on your pH.
- 8Reconnect or re-install control unit and run as per normal operation.
Additional Resources
For more information regarding water balancing and amount of chemicals to add, please see the Updated Portable Spas Water Care Guide.


